Android StudioのActivityTemplate全部試してみた!(1/2)
AndroidStudioでActivityを追加するとき、とりあえず何も考えずにEmptyActivityを選択していました。
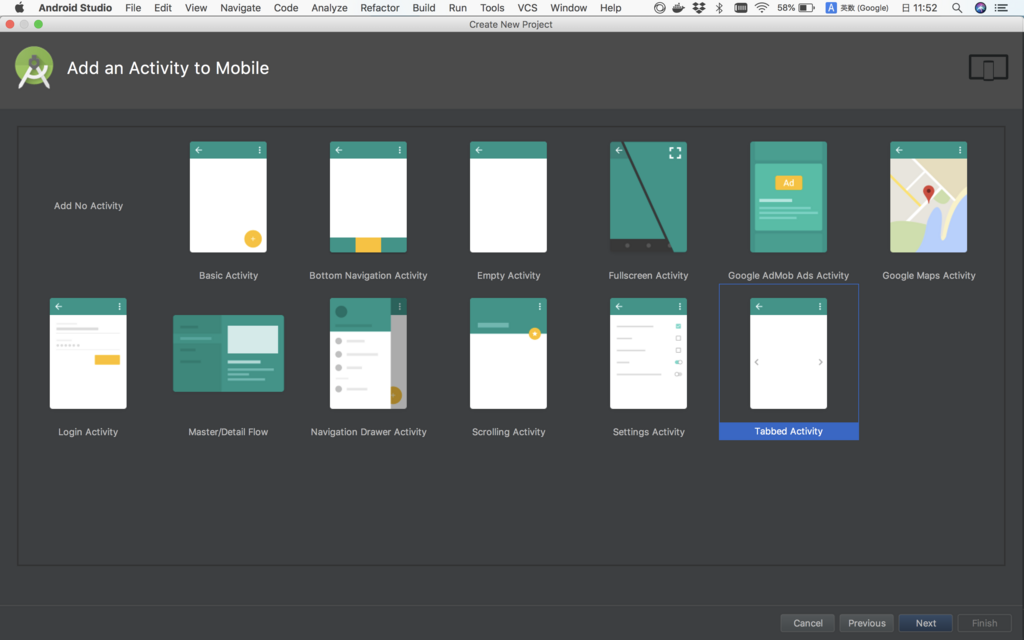
これ他の選ぶとどうなってるんだろう、とふと気になってしまい、、、
とりあえず全部遊んでみることにしました。
リポジトリはこちら
目次(1/2)
- Basic Activity
- BottomNavigationActivity
- FullscreenActivity
- GoogleAdMobAdsActivity
- GoogleMapsActivity
- LoginActivity
Basic Activity
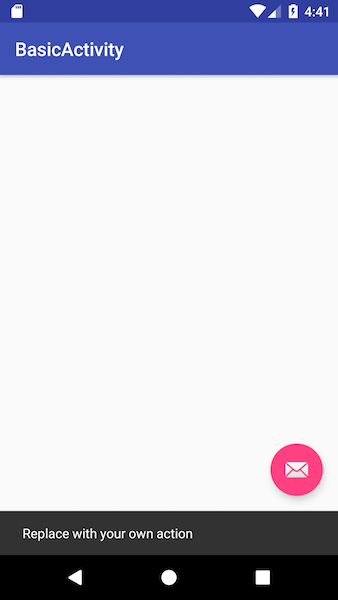
特徴
- Toolbarが設定されている
- FloatActionButtonが配置されている
onClickListenerでToastを表示
content_{ActivityName}の名前で空のConstraintLayoutがincludeされている
特に難しいものはないですね。ToolbarやFABを生成してくれるのは使い勝手が良さそうです。
BottomNavigationActivity
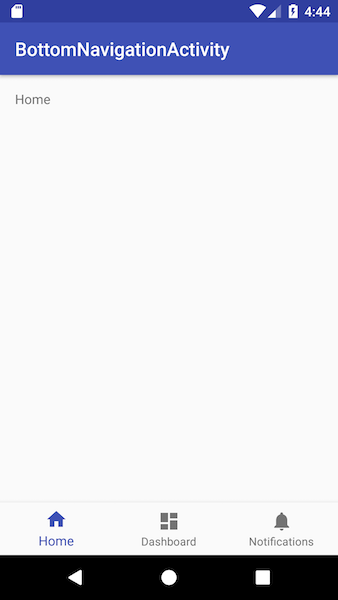
- BottomNavigationの配置
- 遷移するとtextが変更
- 選択したアイコンは色が変わってサイズが少し大きくなる
res/menuを使用したデータ受け渡し (あれ、menuなんて使ったことなかった……これめっちゃ便利……)
FullscreenActivity

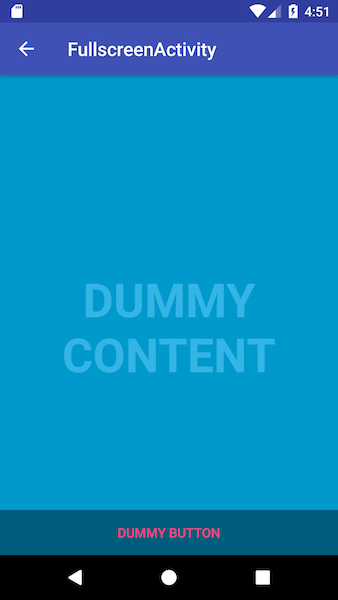
- Fullscreen表示に対応
- タップしたらFullscreenの解除、設定のトグル
面白そうなのでソースも追っていきます。分解して見ていきましょう
Source
- onCreate()
override fun onCreate(savedInstanceState: Bundle?) {
    super.onCreate(savedInstanceState)

    setContentView(R.layout.activity_fullscreen)
    supportActionBar?.setDisplayHomeAsUpEnabled(true)

    mVisible = true

    // Set up the user interaction to manually show or hide the system UI.
    fullscreen_content.setOnClickListener { toggle() }

    // Upon interacting with UI controls, delay any scheduled hide()
    // operations to prevent the jarring behavior of controls going away
    // while interacting with the UI.
    dummy_button.setOnTouchListener(mDelayHideTouchListener)
}
- toggle()
private fun toggle() {
    if (mVisible) {
        hide()
    } else {
        show()
    }
}
- hide()
private fun hide() {
    // Hide UI first
    supportActionBar?.hide()
    fullscreen_content_controls.visibility = View.GONE
    mVisible = false

    // Schedule a runnable to remove the status and navigation bar after a delay
    mHideHandler.removeCallbacks(mShowPart2Runnable)
    mHideHandler.postDelayed(mHidePart2Runnable, UI_ANIMATION_DELAY.toLong())
}
- mShowPart2Runnable
private val mShowPart2Runnable = Runnable {
    // Delayed display of UI elements
    supportActionBar?.show()
    fullscreen_content_controls.visibility = View.VISIBLE
}
- mHidePart2Runnable
private val mHidePart2Runnable = Runnable {
    // Delayed removal of status and navigation bar

    // Note that some of these constants are new as of API 16 (Jelly Bean)
    // and API 19 (KitKat). It is safe to use them, as they are inlined
    // at compile-time and do nothing on earlier devices.
    fullscreen_content.systemUiVisibility =
            View.SYSTEM_UI_FLAG_LOW_PROFILE or
            View.SYSTEM_UI_FLAG_FULLSCREEN or
            View.SYSTEM_UI_FLAG_LAYOUT_STABLE or
            View.SYSTEM_UI_FLAG_IMMERSIVE_STICKY or
            View.SYSTEM_UI_FLAG_LAYOUT_HIDE_NAVIGATION or
            View.SYSTEM_UI_FLAG_HIDE_NAVIGATION
}
systemUiVisibilityについては、こちらの記事が詳しいです。Android4.xの時期、ハードの物理ボタンが無くなった時期に生まれたんですね。Xperia acroとか懐かしい……。
GoogleAdMobAdsActivity

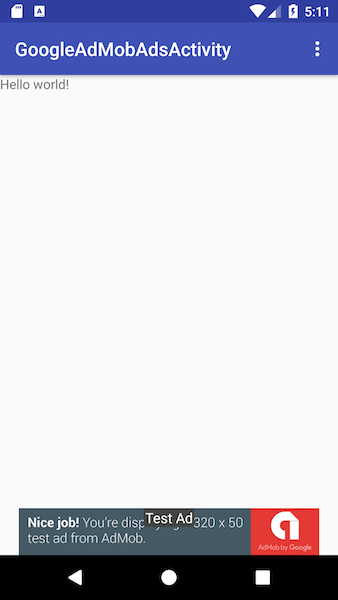
特徴
- GoogleのAdMobを使用する
- Interstitial(全画面)タイプの広告、Bannerタイプの広告の2種類がある
Source
Interstitialの場合もBannerの場合も、呼んでるAPIは変わらないみたいです。以下、Interstitialの例です。
build.gradle
dependencies {
    implementation 'com.google.android.gms:play-services-ads:15.0.1'
Activity
// Create the InterstitialAd and set the adUnitId (defined in values/strings.xml).
interstitialAd = newInterstitialAd()
loadInterstitial()

...

private fun newInterstitialAd(): InterstitialAd {
    return InterstitialAd(this).apply {
        adUnitId = getString(R.string.interstitial_ad_unit_id)
        adListener = object : AdListener() {
            override fun onAdLoaded() {
                next_level_button.isEnabled = true
            }

            override fun onAdFailedToLoad(errorCode: Int) {
                next_level_button.isEnabled = true
            }

            override fun onAdClosed() {
                // Proceed to the next level.
                goToNextLevel()
            }
        }
    }
}

private fun showInterstitial() {
    // Show the ad if it's ready. Otherwise toast and reload the ad.
    if (interstitialAd?.isLoaded == true) {
        interstitialAd?.show()
    } else {
        Toast.makeText(this, "Ad did not load", Toast.LENGTH_SHORT).show()
        goToNextLevel()
    }
}

private fun loadInterstitial() {
    // Disable the next level button and load the ad.
    next_level_button.isEnabled = false
    val adRequest = AdRequest.Builder()
            .setRequestAgent("android_studio:ad_template")
            .build()
    interstitialAd?.loadAd(adRequest)
}
...
基本的な流れとしては、
InterstitialAd(this).applyでInterstitialの広告を生成AdRequest.Builder()で広告リクエストを作成interstitialAd?.loadAd(adRequest)で実際に広告をリクエスト
となっているようです。
GoogleMapsActivity

特徴
- GoogleMapを表示
- 事前にgoogle developer consoleでGoogle MapsのAPI keyの取得が必須
res/values/google_maps_api.xmlを参照
Source
コードはそんなに複雑ではありません。
build.gradle
dependencies {
    implementation 'com.google.android.gms:play-services-maps:15.0.1'
Activity
import android.support.v7.app.AppCompatActivity
import android.os.Bundle

import com.google.android.gms.maps.CameraUpdateFactory
import com.google.android.gms.maps.GoogleMap
import com.google.android.gms.maps.OnMapReadyCallback
import com.google.android.gms.maps.SupportMapFragment
import com.google.android.gms.maps.model.LatLng
import com.google.android.gms.maps.model.MarkerOptions

class MapsActivity : AppCompatActivity(), OnMapReadyCallback {

    private lateinit var mMap: GoogleMap

    override fun onCreate(savedInstanceState: Bundle?) {
        super.onCreate(savedInstanceState)
        setContentView(R.layout.activity_maps)
        // Obtain the SupportMapFragment and get notified when the map is ready to be used.
        val mapFragment = supportFragmentManager
                .findFragmentById(R.id.map) as SupportMapFragment
        mapFragment.getMapAsync(this)
    }

    /**
     * Manipulates the map once available.
     * This callback is triggered when the map is ready to be used.
     * This is where we can add markers or lines, add listeners or move the camera. In this case,
     * we just add a marker near Sydney, Australia.
     * If Google Play services is not installed on the device, the user will be prompted to install
     * it inside the SupportMapFragment. This method will only be triggered once the user has
     * installed Google Play services and returned to the app.
     */
    override fun onMapReady(googleMap: GoogleMap) {
        mMap = googleMap

        // Add a marker in Sydney and move the camera
        val sydney = LatLng(-34.0, 151.0)
        mMap.addMarker(MarkerOptions().position(sydney).title("Marker in Sydney"))
        mMap.moveCamera(CameraUpdateFactory.newLatLng(sydney))
    }
}
一旦今回はここまで!
残り6つはまた次回。。。